
A dull, sticky skillet ruins more breakfasts than anyone likes to admit. If eggs are gluing themselves to the pan or rust spots have started creeping across the surface, learning how to season iron cast cookware properly is the fix that actually sticks. This isn’t a quick wipe-and-hope job. It’s a short chemistry lesson disguised as a kitchen chore, and once it clicks, you’ll never look at a skillet the same way again.
Standing over a warm skillet with a rag of oil in hand, you start to understand why this material has survived centuries of trends, gadgets, and nonstick coatings that flake off in two years. Cast iron doesn’t ask for much. It just asks to be treated right.
What Seasoning Actually Means
Seasoning has nothing to do with salt or pepper here. It’s a layer of oil that’s been heated past its smoke point until it transforms into something closer to a hard, plastic-like coating bonded to the metal.
This process is called polymerization. When oil gets hot enough, its fatty acid chains break apart, then reconnect into long, cross-linked networks that fuse directly onto the iron. The result is a slick, dark surface that repels water, resists rust, and lets food slide right off.
Anyone who has restored an old, rusty skillet from a flea market knows the transformation is dramatic. What starts as a dull gray or orange-flecked pan ends up looking almost black, glassy, and alive.
Most new cast iron cookware, including entry-level brands, arrives factory pre-seasoned with a thin oil coating. It’s usable right out of the box, but running it through one or two extra rounds of home seasoning before the first real cook builds a stronger foundation and reduces early stickiness.
What You’ll Need
- A cast iron skillet, griddle, or Dutch oven
- Dish soap and warm water
- A soft cloth or paper towels
- A high smoke point oil (grapeseed, canola, or refined vegetable oil)
- Aluminum foil or a baking sheet
- An oven that reaches at least 450°F
How to Season Iron Cast: Step-by-Step Method
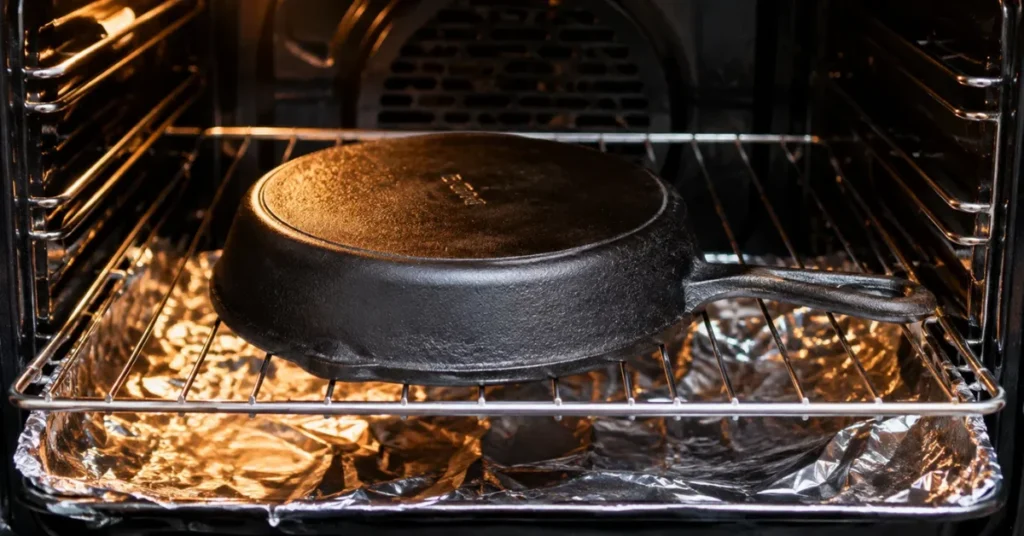
The exact process for how to season iron cast cookware isn’t complicated, but skipping a step usually means a sticky or patchy result. Here’s the sequence that works, whether the pan is brand new or pulled from a garage sale bin.
1. Wash it thoroughly. Use warm water and a small amount of dish soap. The old myth that soap ruins cast iron doesn’t hold up. A quick wash won’t strip a properly built seasoning layer, and if the pan is bare or rusty anyway, this step matters even more.
2. Dry it completely. Set the pan on a stovetop burner over low heat for a couple of minutes. This drives off any lingering moisture hiding in the pores of the metal, which prevents flash rust from forming before oil goes on.
3. Apply a whisper-thin layer of oil. Rub oil over every surface, including the handle, the underside, and the edges. For a standard 10-12 inch skillet, half a teaspoon is usually plenty. Then wipe off nearly all of it with a clean cloth until the surface looks almost dry. This part trips people up constantly: less oil produces a smoother, harder finish than a thick, glossy coat.
4. Turn on ventilation before baking. Open a window or switch on the exhaust fan first. The pan will smoke during this process, and that smoke can trigger a kitchen smoke alarm if the room isn’t ventilated.
5. Bake it upside down. Place the skillet face-down in the oven, with foil or a baking sheet on the rack below to catch drips. Most guides land somewhere between 400°F and 500°F, depending on the oil’s smoke point.
6. Let it bake for about an hour, then cool inside the oven. Turning off the heat and letting the pan cool slowly, with the door shut, helps the new layer cure evenly instead of cracking from a sudden temperature drop.
7. Repeat two or three times for a fresh build. One round creates a workable layer, but stacking several thin coats produces a tougher, more durable surface right out of the gate.
Don’t expect a glassy, fully nonstick finish after just one session. That level of performance usually builds over weeks of regular cooking, as each meal adds another microscopic layer on top of the base coat.
No Oven? The Stovetop Method
Anyone without oven access, or just maintaining the cooking surface between deep seasons, can rely on the stovetop instead. Heat the clean, dry pan over medium for two to three minutes, add a thin coat of oil, then bump the heat to medium-high until the oil starts to smoke lightly. Hold it there for two to three minutes, turn off the heat, and let it cool before wiping with a dry paper towel. This method only covers the cooking surface, not the handle or exterior, so it works best as touch-up care rather than a full rebuild.
Induction cooktops work fine with cast iron and this same method applies. Start on a lower setting than usual, since induction heats faster than gas or electric coils and can overshoot the target temperature quickly.
Choosing the Right Oil
Not every oil in the pantry belongs anywhere near a seasoning project. The winning trait is a high smoke point paired with a good ratio of unsaturated fat, since those molecules are more reactive and bond more readily during polymerization.
| Oil | Smoke Point | Best For Seasoning |
|---|---|---|
| Grapeseed Oil | ~400°F | Top choice — neutral, affordable |
| Canola Oil | ~400°F | Reliable all-purpose option |
| Refined Vegetable Oil | ~400-450°F | Widely available, easy to apply |
| Flaxseed Oil | ~225°F | Hardest finish, but flakes if applied thick |
| Extra Virgin Olive Oil | ~375°F | Skip — too low, leaves sticky finish |
Grapeseed oil, canola oil, and refined vegetable oil are the most commonly recommended choices, largely because they’re affordable, widely available, and neutral in flavor. Flaxseed oil produces an exceptionally hard finish but is unforgiving. Applied too thick, it flakes off in sheets rather than bonding smoothly.
Butter, unrefined coconut oil, and extra virgin olive oil are best left for cooking, not seasoning. Their smoke points sit too low, which means they scorch before they can properly polymerize, leaving a tacky residue instead of a hard shell.
A cast iron enthusiast who has stripped and rebuilt more than one pan will tell you the oil matters less than the thickness of the coat. A cheap oil applied correctly beats an expensive one slathered on too heavy, every single time.
Everyday Maintenance After the Initial Season
Getting through the first seasoning round is only half the story. What happens after each meal decides whether that surface improves or slowly degrades.
- Clean the pan with hot water and a stiff brush right after cooking, while it’s still warm.
- Skip harsh scouring pads unless stripping the pan down on purpose.
- Never put cast iron in a dishwasher — the prolonged water exposure and harsh detergent strip the seasoning and invite rust.
- Dry it immediately, ideally on the stove over low heat.
- Rub in a thin film of oil while the pan is still warm, then buff off the excess.
- Store it somewhere dry, with the lid propped slightly open if it’s a Dutch oven, so trapped moisture doesn’t sit against the seasoned surface.
Cooking fatty foods like bacon or sausage in the early weeks helps build additional layers naturally — it’s also a great time to try your cast iron skillet on a steak, since the fat renders beautifully and adds to the seasoning. For the first few cooks, it’s worth holding off on delicate items like eggs or fish, since a brand-new seasoning layer is still thin and more prone to sticking. It’s also wise to avoid heavily acidic dishes, like tomato sauce or anything with a lot of lemon juice, until the seasoning is well established, since acid can break down a fresh layer before it’s had time to harden fully.
Fixing a Damaged or Rusty Pan
Anyone who has inherited a neglected skillet knows the sinking feeling of orange rust spots or a sticky, uneven surface. The good news is that cast iron is nearly impossible to ruin permanently.
For light rust, a scrub with steel wool and warm water usually clears it. For more serious damage, a vinegar-and-water soak (never longer than about 20 minutes, since extended soaking can pit the metal) strips the pan down to bare gray iron. From there, it’s back to square one: dry immediately, then run through the full seasoning process described above.
A pan with old, gummy, half-burned seasoning benefits from a full strip and rebuild rather than layering more oil over a flawed base. Patching over a bad foundation rarely holds up under regular cooking heat.
Common Seasoning Problems and Fixes
Even careful cooks run into hiccups. A few of the most frequent ones:
- Patchy or blotchy finish: Usually means the oil layer wasn’t spread evenly before baking. Wipe the pan more thoroughly next round and make sure every inch gets the same thin coat.
- Sticky residue after baking: Almost always too much oil. Wipe off more than feels necessary; a coat that looks nearly dry bakes into a smoother finish than one that looks glossy.
- Faint smoky smell after cooking: Normal for the first few uses as leftover oil residue burns off. It should fade with continued use.
- Seasoning flaking off in sheets: Common with flaxseed oil applied too thickly. Strip and rebuild using thinner layers of a more forgiving oil like canola or grapeseed.
The Science Behind a Good Seasoning Layer
Detailed analysis of cookware forums, cooking science writing, and manufacturer guidance points to a consistent pattern: thin layers beat thick ones, and consistency beats any single miracle oil. Research into oil chemistry shows that unsaturated fats with a higher iodine value, meaning more reactive double bonds, polymerize into a harder, more durable coating than saturated fats like lard or coconut oil.
A seasoned surface becomes hydrophobic once fully polymerized, according to reference material on cookware chemistry, which is exactly why water beads up and food releases cleanly from a well-maintained pan. Examining this closely also reveals why so many older, decades-old skillets from secondhand shops still perform beautifully once restored. The polymer layer, once properly built, doesn’t have an expiration date. It just needs periodic attention.
Who Actually Needs to Worry About This
Beginners often assume seasoning is a one-time chore reserved for die-hard cast iron collectors, but that’s not accurate. Anyone using a traditional (non-enameled) cast iron skillet, griddle, or Dutch oven needs to keep this process in mind.
New cookware owners benefit from adding a couple of extra rounds of seasoning right out of the box, even if the pan arrives pre-seasoned from the manufacturer. Households in humid climates should season a bit more often, since moisture in the air speeds up rust formation on any exposed bare spots. Dutch oven owners should treat the lid as a separate piece, since it needs its own thin coat and doesn’t always get even heat if left resting on top during baking. And anyone who just picked up a rusty vintage find at a yard sale needs the full strip-and-rebuild treatment before it touches a stove.
Conclusion
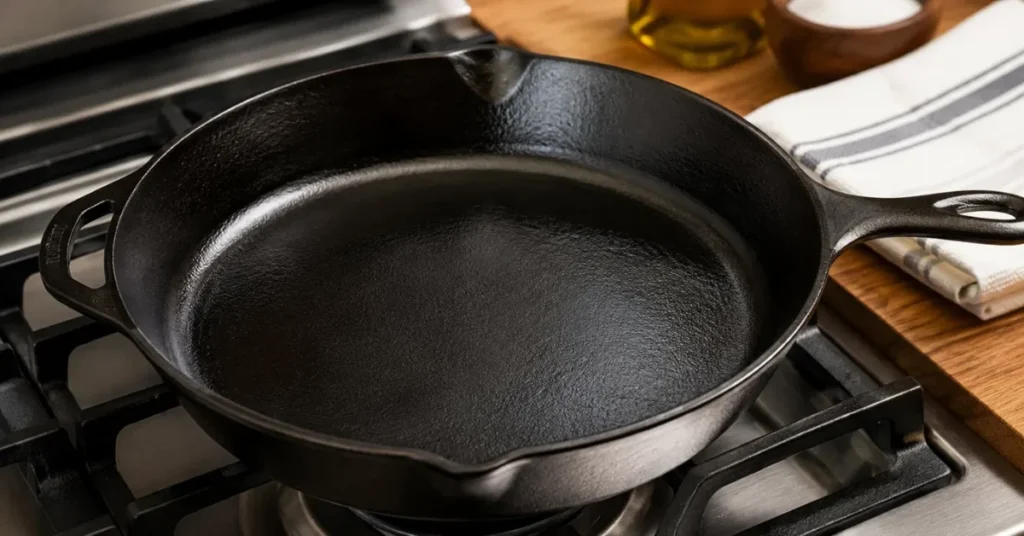
Getting comfortable with how to season iron cast cookware turns a stubborn, sticky pan into one of the most reliable tools in the kitchen. It isn’t about buying special products or memorizing complicated ratios. It comes down to a clean pan, a thin oil layer, consistent heat, and patience over repeated uses. Once that dark, slick surface builds up, cooking on cast iron starts to feel less like a chore and more like working with a tool that only gets better with age.
FAQs
How often should I season my cast iron skillet?
Full oven seasoning is usually only needed once or twice a year for a well-used pan, though a light oil wipe after each wash helps maintain the surface between deep sessions.
Can I use olive oil to season cast iron?
Refined or light olive oil works reasonably well thanks to its higher smoke point, but extra virgin olive oil tends to leave a stickier, less durable finish.
Why is my seasoning turning out sticky instead of smooth?
This almost always comes down to applying too much oil. Wipe off far more than feels necessary before baking; a coat that looks nearly dry produces a better result than one that looks glossy.
Is it safe to use soap on a seasoned cast iron pan?
Yes. A small amount of dish soap won’t strip a properly polymerized layer. It only becomes a concern on a very thin or new seasoning that hasn’t fully built up yet. A dishwasher, on the other hand, should always be avoided.
Do I need to season enameled cast iron?
No. Enameled cast iron has a glass-like coating baked on during manufacturing and doesn’t require the oil-and-heat seasoning process described here.